Building an email list might sound a bit old school, but it remains one of the smartest things you can do for your digital business.
Social media algorithms change overnight.
Accounts get banned for absolutely no reason.
Entire platforms disappear without a trace.
But your email list?
That’s yours.
In this guide, I’ll show you step-by-step how to build your email subscriber base with a simple system.
You’ll discover how to:
- Start a FREE email list
- Create a lead magnet so you can build your list
- Deliver your lead magnet instantly without paying a penny
By the end, you’ll have a highly effective way to turn strangers into subscribers.
Why an Email List is Essential For Your Online Brand
Before we dive into the step-by-step tutorial, let’s dig into why this even matters.
You Own Your Email List
Your Instagram followers, TikTok viewers, or YouTube subscribers don’t technically belong to you.
They belong to the platform.
If your account gets banned, hacked, or simply hidden by an algorithm update, you can lose access to thousands of people overnight.
An email list is different because those contacts are yours and can be exported and imported anywhere.
Direct Access to Your Audience
Emails land straight in someone’s inbox, in the same place they get messages from friends, family, and even their bank and doctor.
That’s a personal space.
When someone gives you their email, they’re opening the door to direct, one-on-one communication.
Stronger Relationships and Trust
Think of your email list as a long-term relationship, rather than a speed date.
Social media posts are fleeting, often scrolled past in seconds.
But emails let you have proper conversations, share your stories, and build trust over time.
You can even personalise emails with someone’s first name, which feels much warmer and more human than a generic broadcast.
Better Conversions Than Social Media
The numbers don’t lie: email marketing consistently outperforms social media when it comes to sales.
And it’s not just about sending one big email to everyone.
You can segment your list and tag people based on their interests.
That way, you only send the right offers to the right people.
If someone clicks on a lead magnet about parenting, you know they’re interested in parenting so you can follow up with more of that content.
You can also go a step further and split parents of toddlers apart from parents of teenagers if you’re smart with your strategy.
Simply put, the best way to build a follower base for your digital brand, by far, is with an email list.
How to Start a FREE Email List
So, how do you actually get started without splashing out on fancy software?
The answer is simple: use Kit.
It’s quick to set up, and takes all the stress out of delivering your lead magnet.
What makes Kit brilliant is its Newsletter plan.
It’s completely FREE until you hit 10,000 subscribers, which is more than enough for beginners.

If you ever max out that plan (a nice problem to have), you can upgrade to their Creator or Creator Pro plans.
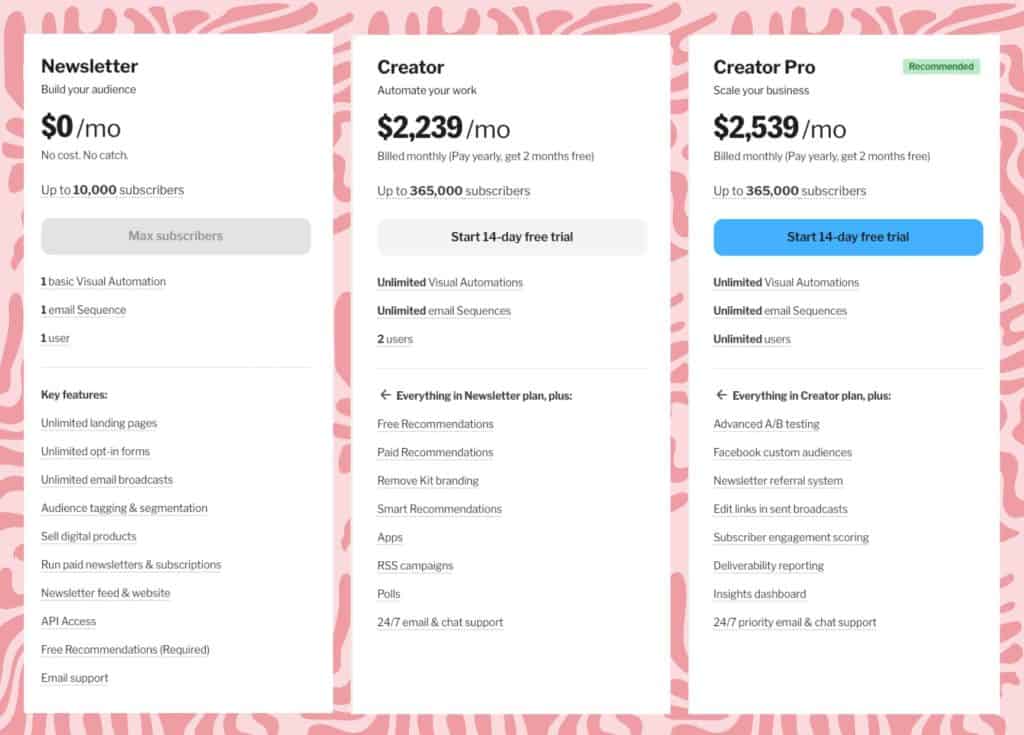
Here’s a quick look at their pricing:
| Subscribers | Newsletter | Creator | Creator Pro |
| Up to 1,000 | $0 | $33 | $66 |
| Up to 3,000 | $0 | $50 | $83 |
| Up to 5,000 | $0 | $75 | $116 |
| Up to 8,000 | $0 | $100 | $141 |
| Up to 10,000 | $0 | $116 | $158 |
| Up to 15,000 | – | $141 | $208 |
| Up to 20,000 | – | $158 | $225 |
| Up to 25,000 | – | $166 | $233 |
| Up to 400,000 | – | $1,916 | $2,166 |
Yes, the higher tiers sound steep, but if you ever reach 400,000 subscribers, your email list will almost certainly be bringing in a lot more than it’ll be costing you to run.
Not something to worry about right now, regardless!

How to Build Your Email Subscriber List
Now that you’ve secured your Kit account, you can begin building your email subscriber base.
The most simple way to do this is with a landing page.
You won’t need a website to do this so don’t worry if you don’t have one yet.
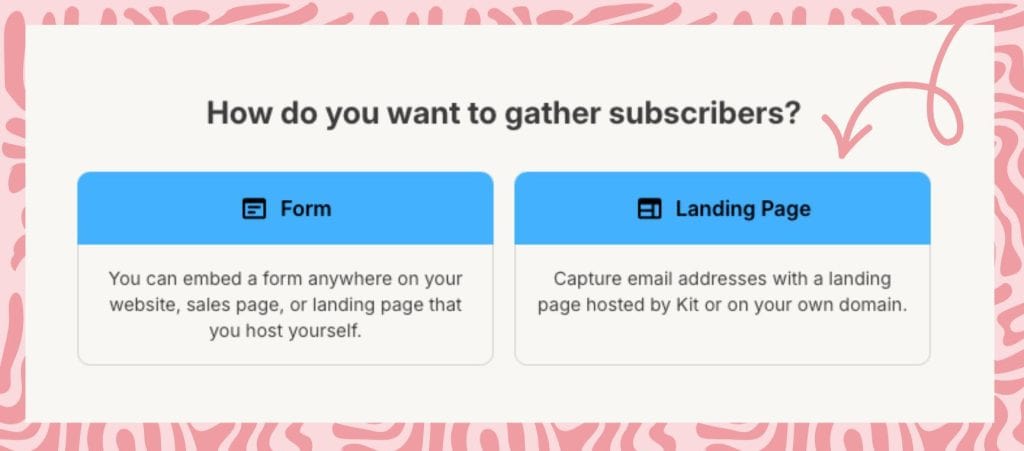
First, select grow from Kit’s menu and choose landing pages and forms.

Next, pick landing page and choose a template.

***
You can customize your chosen template by selecting the elements you want to change.

***
Once you’re happy with how your landing page looks, select save and publish.


Congrats!
Your landing page is ready to share.
You can just grab the link and place it wherever you see fit.

**
How to Create a Lead Magnet in Canva
A landing page is a brilliant, beginner friendly entry point to building an email list but let’s be honest.
‘Subscribe!’ isn’t exactly the most enticing call to action, is it?
You’ll be much more likely to attract leads with a lead magnet.
A lead magnet is a free resource you offer in exchange for someone’s email address.
Think of it as a little taste of the value you provide.
Something useful, actionable, or inspiring that makes people say: “Yes, I want this!”
Lead magnets can take many forms, from free eBooks to checklists and printable resources.
Unsure what you should offer?
You can unlock 15 lead magnet ideas with the free downloadable list below:
See what I did there?
Note how my lead magnet is hyper relevant to the content I created it for.
The key is that it solves the problem my audience actually has and does so quickly.
The more immediate and practical the benefit, the more likely people are to hand over their email.
How to Create a Lead Magnet in Canva
Now, as for how I created my lead magnet on lead magnets.
The secret is out: Canva.

Canva is the ultimate design suite and I’m not just saying that because I’m an affiliate.
In fact, I’m not an affiliate.
Unfortunately for me, their creator program closed!
Still, I can’t recommend Canva enough because I’ve used their pro plan since 2018.
It’s incredibly easy to use, even if you’re terrible with design.
It’ll make you look like a design genius even if you can’t draw a stick figure.
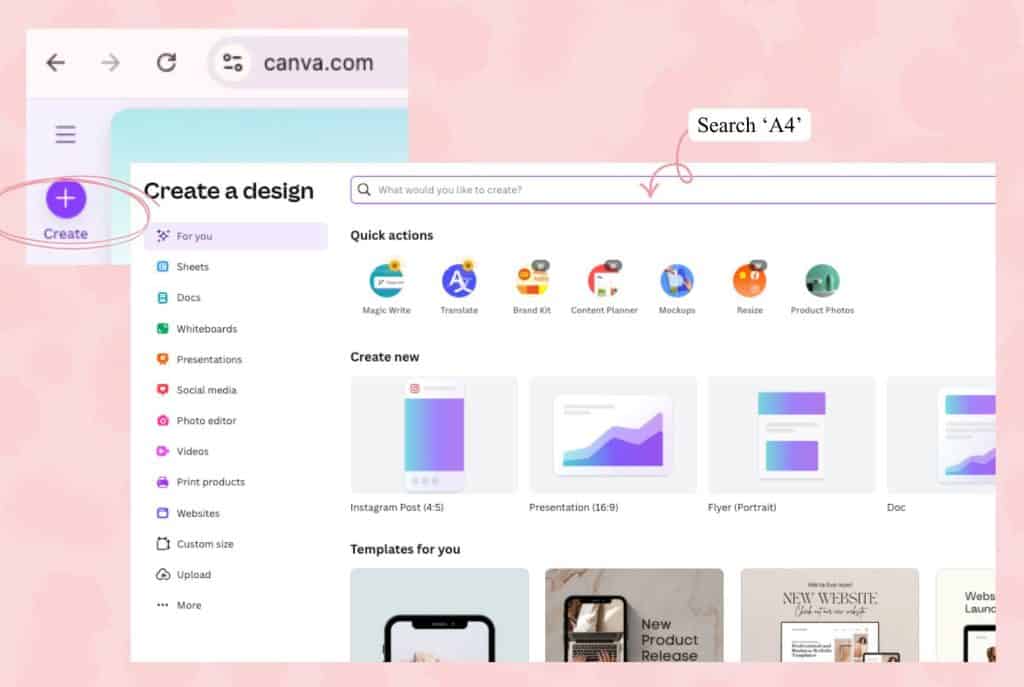
You can create a FREE account here or start a free trial of Canva pro.
Once you’re in, hit the Create a design button in the top right corner and search A4.
A4 is the perfect size for a PDF freebie as well as Pinterest pins.
Step 2: Pick a Template
On the left, select design and browse templates in Canva’s library.
Type ebook, workbook or whichever template type best fits your freebie into the search bar.

Scroll until you find something clean and simple.
Trust me, less is more here.
Click on the template to load it into your design and replace all pages with templates.
*

Step 3: Add Your Title
Click on the main title text box and type in your title.

Then play around with fonts and colours until you’re happy.
Tip: Stick with two fonts max. One for headings, one for body text.
Step 4: Add Your Content
Now, let’s fill in the meat of your lead magnet.
On the left toolbar, you’ll find visual elements you can use such as text, images and graphics.
If you’re on the free plan, make sure to toggle the free filter so you aren’t charged when it comes to downloading your design.

If you’re on the pro plan, your designs will always be free to download.
Don’t be disheartened if your first design isn’t as captivating as you’d hoped it would be.
I usually make 5-10 covers before I’m happy with the outcome.

Just play around and I’m sure you’ll improve.
This is the cover I landed on:

Step 5: Brand It
Add your logo or just type your website at the top or bottom of each page.
Make sure to add your link so your subscribers have an easy route back to your website.

Pick your brand colours so your lead magnet looks consistent with the rest of your content.
You can set colours in the top toolbar.
If you don’t have brand colours yet, choose 2–3 that look good together and stick with them.
Step 6: Add your links
The last thing you want is for your lead magnet to lead to a dead end.
You can easily avoid this undesirable outcome by adding links.
Whether you’re linking to your free content, products you sell or affiliate offers, you definitely want your leads to land somewhere beyond the PDF you provide.
I decided to link back to this blog post because my audience might need to reference this post again.

I also linked my Kit affiliate link.
Heads up, if you do add affiliate links to your lead magnet, you MUST disclose your affiliation!

In my case, I linked a free resource and won’t be compensated if someone signs up to my recommendation.
However, I will be compensated if they subscribe to a paid plan, even if they click my free recommendation.
For this reason, I legally had to disclose it.
Step 7: Add a Final Call to Action
At the very end of your lead magnet, add a compelling call to action to gently nudge people back into your world after they’ve read your freebie without seeming too salesy or pushy.
Step 8: Download as PDF
Once you’re happy with your design, click the share button in the top right.

Choose download, PDF standard (this keeps the file size small and easy to share).
Hit done to download
And that’s it!
You’ve just created your first lead magnet in Canva.
How to Offer Your Lead Magnet with Kit
So, you’ve got your irresistible lead magnet ready.
But now comes the big question: How do you actually give it to people?
That’s where Kit comes in.
Step 1: Create a Form
Select grow from the menu and click landing pages and forms.

Then create a new form.

Choose how you’d like to display your form.
I chose inline because I’ll be embedding my lead magnet into a blog post.

Step 2: Select a template
Select a template to customize.


Step 3: Customize your form template
To customize your form, select the element you want to tweak and these options will appear:

Step 4: Upload your Lead Magnet
Once you’re happy with your form, select settings.
Then upload your PDF.


Before you hit save, edit the email contents.
Step 5: Edit Email Contents
Swap the generic subscription confirmation email for something more personal.
Save your last steps.


Step 6: Save and Publish
Now you can save and publish your form.


Once it’s saved, select embed.
Copy the HTML code and paste it into your blog post or onto your website.


Wrapping Up
And there you go.
You’ve just delivered your lead magnet through Kit without touching a single complicated bit of email software.
I hope this tutorial was helpful.
Wishing you the very best of luck on your list building endeavors!

0 Comments